
Concrete is one of the most durable and versatile building materials in the world — from driveways and patios to sidewalks, garage floors, and pool decks. But even the toughest surfaces need some TLC to maintain their appearance and prevent long-term damage. Over time, concrete can become stained from oil, mold, mildew, dirt, rust, and even algae growth. If you’ve been wondering how to restore that clean, fresh look, you’re in the right place.
In this detailed guide, ZZ the HANDYMAN walks you through the 6 essential steps to clean concrete like a pro, so you can enhance your curb appeal and protect your investment.
Why Cleaning Concrete Matters
Before diving into the step-by-step process, it’s important to understand why cleaning concrete regularly is worth your time:
- Improved Appearance – Clean concrete instantly boosts your property’s curb appeal.
- Prevents Damage – Mold, moss, and mildew can erode the surface over time.
- Increases Safety – Removing algae and grease reduces slip hazards.
- Extends Lifespan – Regular maintenance keeps concrete strong for decades.
Concrete is porous, which means dirt and liquids seep inside, causing discoloration that can be hard to remove if ignored. That’s why ZZ the HANDYMAN recommends a thorough cleaning at least once a year — more often for high-traffic areas.
Step 1: Clear the Area and Sweep Away Debris
The first step in cleaning any concrete surface is to prepare it for deep cleaning.
Here’s what to do:
- Remove furniture, vehicles, and equipment – Make sure the surface is completely clear.
- Sweep thoroughly – Use a stiff-bristled broom to sweep away leaves, dirt, and loose debris.
- Look for trouble spots – Take note of oil stains, rust, or mold patches so you can treat them later.
Pro Tip from ZZ the HANDYMAN: For outdoor surfaces, use a leaf blower instead of a broom to speed up the process and get debris out of cracks.
Step 2: Rinse the Concrete Surface
Once the area is clear, give it a good rinse to loosen up surface grime.
Here’s how:
- Use a garden hose with a spray nozzle or a pressure washer on a low setting.
- Start from one end and work your way across to ensure even coverage.
- Pay attention to cracks and edges where dirt tends to build up.
Rinsing not only makes the surface easier to clean but also prevents cleaning agents from being absorbed too quickly.
Step 3: Apply the Right Cleaning Solution
Choosing the correct cleaner for your concrete surface is critical. ZZ the HANDYMAN suggests different solutions based on the type of stain you’re dealing with:
- General Dirt & Grime – A mixture of warm water and mild dish soap works well.
- Oil & Grease Stains – Use a degreaser specifically designed for concrete.
- Mold & Mildew – Mix one part bleach with three parts water for an effective mildew remover.
- Rust Stains – Use a commercial rust remover made for masonry.
Application tips:
- Wear gloves and eye protection when handling chemicals.
- Apply the cleaner evenly with a pump sprayer or watering can.
- Let it sit for 10–15 minutes to break down the stains.
Pro Tip from ZZ the HANDYMAN: Avoid using metal brushes on concrete — they can leave rust marks. A stiff nylon-bristle brush is best.
Step 4: Scrub Stains Thoroughly
Now it’s time to put in a little elbow grease.
- Use a long-handled scrub brush or deck brush with stiff bristles.
- Focus on heavily stained areas first.
- Apply circular motions to lift dirt and stains from the pores of the concrete.
For stubborn oil spots:
- Sprinkle baking soda directly on the stain before scrubbing.
- Baking soda acts as a natural abrasive and absorbs excess oil.
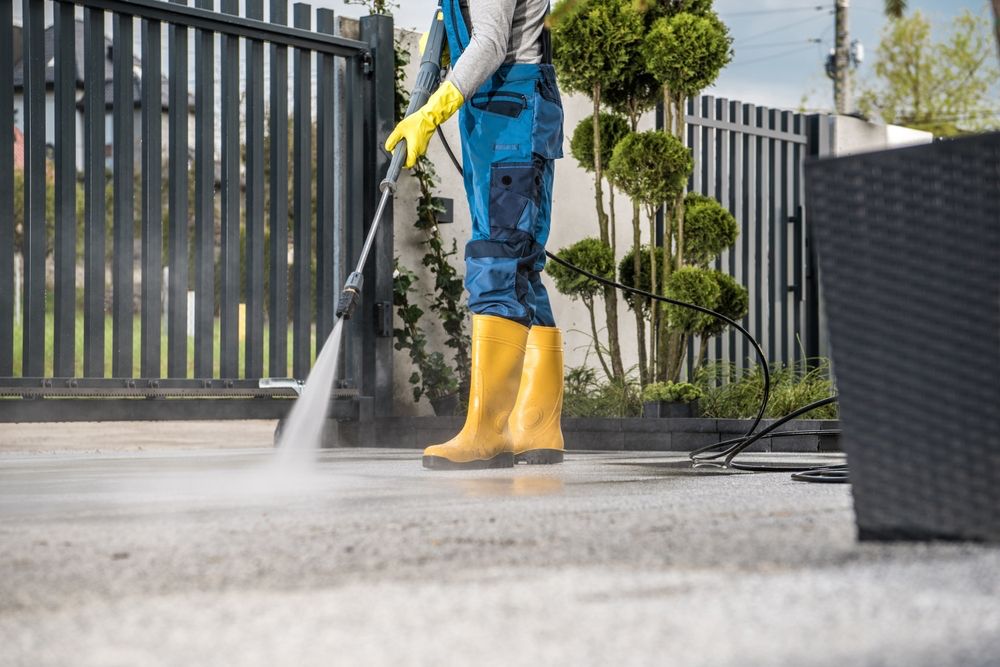
Step 5: Pressure Wash for a Deep Clean
If you want that “just-poured” look, pressure washing is the key.
- Set your pressure washer between 2,500–3,000 PSI for most concrete surfaces.
- Use a 25-degree nozzle for wide coverage and effective cleaning.
- Work in sections, overlapping slightly to avoid streaks.
- Keep the nozzle at least 12 inches from the surface to prevent damage.
Pro Tip from ZZ the HANDYMAN: If you don’t own a pressure washer, you can rent one from a local home improvement store for the day — it’s worth it for the results.
Step 6: Rinse and Seal the Concrete
After scrubbing and pressure washing, a final rinse is essential:
- Use clean water to wash away any remaining detergent or loosened debris.
- Allow the surface to dry completely — this can take 24–48 hours depending on weather conditions.
- Once dry, apply a concrete sealer to protect against future stains, water damage, and UV rays.
Sealing your concrete every 2–3 years will keep it looking fresh and make future cleaning much easier.
Extra Tips for Specific Concrete Areas
Driveways
Driveways are prone to oil, grease, and tire marks. Using a degreaser before pressure washing is essential. For older stains, you may need to repeat the process twice.
Patios
Since patios often host outdoor gatherings, food and drink spills are common. A mild detergent works best, followed by a rinse and seal to protect against barbecue grease and wine stains.
Garage Floors
Garage floors see a lot of oil and chemical spills. Use kitty litter to absorb fresh oil before applying a degreaser.
Pool Decks
Pool decks are often exposed to water, chlorine, and sunscreen residue. Use a non-toxic, pool-safe cleaner to avoid contaminating pool water.
Common Mistakes to Avoid
- Using the wrong cleaner – Acidic cleaners can etch and discolor your concrete.
- Overusing high pressure – Too much PSI can chip or pit the surface.
- Skipping the sealer – Without sealing, your clean concrete will stain again quickly.
- Cleaning in direct sunlight – This can cause cleaning solutions to dry too fast and leave streaks.
When to Call the Pros
While DIY concrete cleaning is manageable, there are times when professional help is the best option:
- Large commercial areas.
- Deep-set stains that won’t budge.
- Mold or mildew covering large sections.
- Annual maintenance for high-traffic properties.
That’s where ZZ the HANDYMAN comes in — offering expert concrete cleaning services to restore your surfaces to their original beauty. Whether it’s your driveway, patio, or garage, we have the tools, knowledge, and eco-friendly solutions to get the job done right.
The ZZ the HANDYMAN Advantage
Why choose ZZ the HANDYMAN for your concrete cleaning needs?
- Experienced Technicians – Trained in the latest cleaning and sealing techniques.
- Professional Equipment – Industrial-grade pressure washers and eco-safe cleaners.
- Customized Solutions – Tailored to your specific stains and surface type.
- Nationwide Service – We serve customers across the country.
Final Thoughts
Concrete might be tough, but it still needs regular care to stay looking its best. By following these 6 steps — clear, rinse, apply cleaner, scrub, pressure wash, and seal — you can restore your concrete’s original beauty and extend its lifespan.
Whether you’re tackling the job yourself or calling in the pros, ZZ the HANDYMAN is here to help. From small patios to expansive driveways, we bring skill, experience, and dedication to every project.
