
Water Stains on Ceilings: Causes, Removal, and Prevention
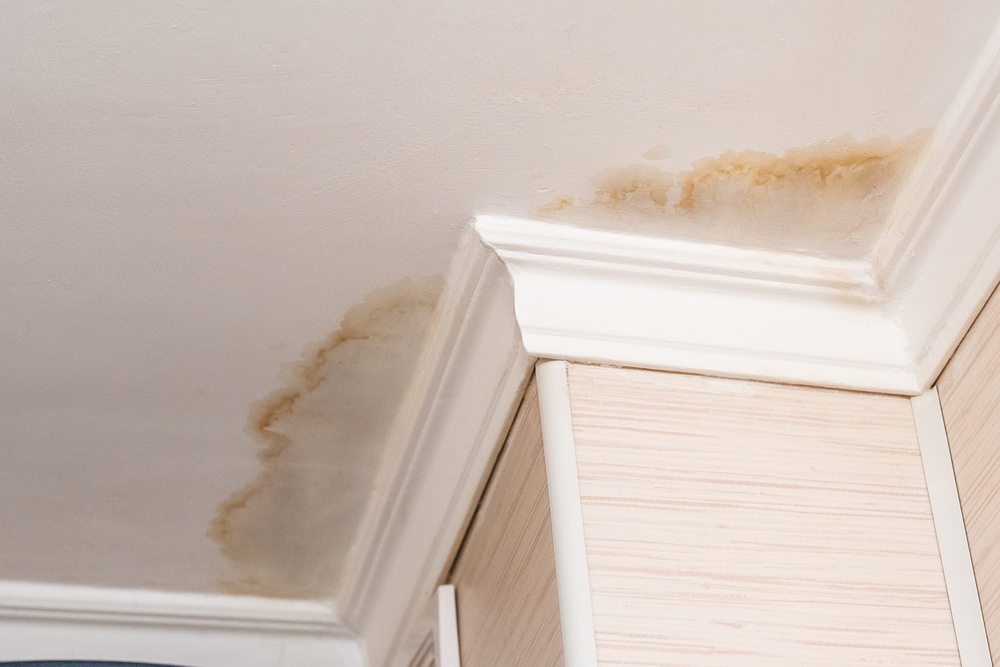
Brought to you by ZZ the HANDYMAN – Your Trusted Home Repair Expert Water stains on your ceiling are more than just unsightly brown patches — they are warning signs of a potential problem in your home. Whether it’s a leaking roof, a plumbing issue, or poor ventilation, water stains should never be ignored. In this guide, ZZ the HANDYMAN breaks down everything you need to know about ceiling water stains, including what causes them, how to remove them, and most importantly, how to prevent them from reappearing. What Are Water Stains on Ceilings? Water stains typically appear as discolored, yellowish-brown patches or rings on your ceiling. They often feel damp, may have a musty smell, and in serious cases, can lead to mold growth, peeling paint, or even structural damage. These stains signal that water has made its way into your ceiling material — a problem that always requires attention. Common Causes of Ceiling Water Stains At ZZ the HANDYMAN, we’ve seen every type of ceiling stain and traced it back to one of these major causes: 1. Leaky Roof Roof leaks are one of the most common sources of water stains, especially after heavy rainfall or snow. Damaged shingles, flashing, or valleys allow water to seep through and pool above your ceiling. 2. Faulty or Old Plumbing Pipes that run through your attic or between floors can leak over time. Even small drips from an upstairs bathroom or kitchen can lead to long-term water damage and staining. 3. Condensation from Poor Ventilation In bathrooms or attics without proper ventilation, humidity can collect on ceiling surfaces, eventually causing stains or mold. This is especially common around bathroom exhaust fans or attic crawlspaces. 4. HVAC Issues Central air conditioning units or ductwork in the attic can produce condensation or leaks, especially if they are poorly insulated or aging. 5. Overflow or Spills from Upstairs Appliances Washing machines, toilets, or tubs located on the floor above can overflow or leak, allowing water to drip down and stain the ceiling below. Step-by-Step Guide: How to Remove Water Stains from Ceilings While ZZ the HANDYMAN always recommends fixing the root cause first, once the leak or moisture issue is addressed, you can move on to stain removal. Tools & Materials You’ll Need: 1. Fix the Source of the Leak Before doing anything else, it’s critical to stop the water source. Whether it’s repairing the roof, replacing a pipe, or sealing ductwork — ZZ the HANDYMAN can help assess and correct the underlying problem. 2. Dry the Affected Area Use fans or a dehumidifier to dry the ceiling thoroughly. Moisture left behind can cause the stain to return or encourage mold growth. 3. Clean the Stain Apply your bleach-water mixture to the stain using a sponge or spray bottle. Let it sit for 10–15 minutes and then blot with a clean, dry cloth. This kills mildew and lightens discoloration. 4. Sand the Surface Lightly sand the area to remove any rough patches, peeling paint, or dried mildew. 5. Prime the Ceiling Use a stain-blocking primer to cover the discolored spot and prevent the stain from bleeding through your new paint. This step is crucial for a long-lasting result. 6. Paint the Ceiling Once the primer is dry, apply ceiling paint to match the rest of your ceiling. You may need 2–3 coats depending on how deep the stain was. When to Call a Professional Water stains can sometimes be the tip of the iceberg. If you’re dealing with: It’s time to call ZZ the HANDYMAN. We specialize in leak detection, roof inspections, ceiling repairs, and water damage restoration — ensuring not just a cosmetic fix but a permanent solution. How to Prevent Water Stains on Ceilings Once your ceiling is clean and looking fresh, it’s essential to take preventative measures to stop future water stains. 1. Regular Roof Maintenance Inspect your roof at least twice a year and after storms. Look for: Regular maintenance can catch minor issues before they turn into major leaks. 2. Check Your Plumbing Watch for signs of moisture near pipes or under sinks, especially on upper floors. Consider installing leak detectors or smart water sensors in high-risk areas. 3. Improve Ventilation Install or upgrade exhaust fans in bathrooms and kitchens. ZZ the HANDYMAN also recommends attic ventilation solutions that help regulate humidity and temperature, preventing condensation buildup. 4. Insulate Pipes and Ductwork Proper insulation helps prevent condensation and freezing (which can cause pipes to burst). This is especially important in attics or exterior-facing walls. 5. Monitor Upstairs Appliances Always install water pans under washing machines or water heaters located on second stories, and inspect water supply lines for wear. Bonus Tip: Don’t Ignore Minor Signs If you see: Treat these as early warning signs. Getting a quick inspection from ZZ the HANDYMAN can save you time, money, and major repairs down the road. Why Choose ZZ the HANDYMAN? Whether you’re dealing with an urgent water leak or planning proactive home maintenance, ZZ the HANDYMAN brings: We believe in transforming homes one project at a time. So if you’ve got a water-stained ceiling that’s making your home look worn-out or damaged, let us help you bring it back to life — beautifully and permanently. Final Thoughts Water stains on ceilings are not just a cosmetic issue — they are often the sign of a hidden problem that requires immediate attention. From leaking pipes to faulty ventilation, identifying and fixing the root cause is the first step. Once that’s done, with a little elbow grease (or help from ZZ the HANDYMAN), your ceiling can look as good as new. Don’t wait until the damage gets worse. Call in a professional, stay proactive, and protect your home.
Water Stains on Ceilings: Causes, Removal, and Prevention Read More »
