Rob

Deck Material Calculator

Deck Material Calculator: Your Ultimate Guide with ZZthe HANDYMAN

If you’re planning to build a beautiful deck for your home, congratulations! A well-designeddeck can significantly enhance your outdoor living space, boost your property value, andoffer the perfect spot to entertain, relax, or enjoy a cup of coffee. But before you grab thatpower drill or hire a contractor, there’s one crucial step you can’t afford to overlook —calculating your deck materials accuratel Why Accurate Material Estimation Matters This is where a Deck Material Calculator comes into play. In this comprehensive guide, ZZthe HANDYMAN walks you through everything you need to know to estimate your deckmaterials like a pro.One of the most common mistakes homeowners make when building a deck isunderestimating (or overestimating) the amount of material needed. Both scenarios can costyou — either in wasted money or in frustrating mid-project shortages.With ZZ the HANDYMAN’s professional insight, using a deck material calculator can helpyou:● Avoid overspending on excess material● Prevent multiple trips to the hardware store● Stay within budget● Plan your project timeline better● Ensure proper structural support and safety What is a Deck Material Calculator? A Deck Material Calculator is a handy digital or manual tool that helps you determine thequantity and types of materials needed to build a deck. It considers various factors such asdeck dimensions, type of wood or composite, joist spacing, railing systems, stairs, and more.ZZ the HANDYMAN recommends using a calculator before buying a single piece of lumber.It saves time, money, and reduces guesswork. Key Inputs Required in a Deck Material Calculator Before you start, gather the following details. The more accurate your inputs, the moreprecise your estimate. Each has different sizes, costs, and installation requirements. ZZ the HANDYMAN can helpyou decide which suits your home and budget. How to Use a Deck Material Calculator Step-by-Step Here’s a simplified walkthrough, curated by ZZ the HANDYMAN:Step 1: Define Your Deck LayoutSketch your deck or use an online design tool. Is it square, rectangular, multi-level, or wrap-around?Step 2: Input DimensionsEnter the length and width. For example, a 12’ x 16’ deck equals 192 square feet.Step 3: Select Decking MaterialChoose your preferred material. Each option has different board widths, so the calculatorcan adjust quantities accordingly.Step 4: Determine Joist & Beam ConfigurationInput joist spacing (commonly 16” on center) and direction. The calculator will estimate howmany joists you need.Step 5: Add Extras● Stairs● Railing systems● Fascia boards● Skirting Step 6: Review and Export the ListYou’ll get a breakdown like:● Number of deck boards● Joists and beams ● Nails or screws● Concrete for footings● Post anchors● Stair treads● Railing components ZZ the HANDYMAN recommends printing or exporting this list to bring it to your localsupplier or share it with your contractor. Common Decking Materials and Their Pros & Cons ZZ the HANDYMAN shares insights into the most popular decking materials: Material Estimation Example: 12×16 Deck Let’s break it down: ● Decking Boards (5.5″ wide): Around 46 boards (16 ft long)● Joists: ~13 joists spaced at 16” OC● Ledger board: 16 ft● Beams: 2x 12 ft beams (depending on span)● Posts: 6–8 posts (depends on layout)● Footings: 6 concrete footings● Railing: 56 linear feet● Stairs: 3-step stair kit or custom stairs ZZ the HANDYMAN emphasizes that it’s always wise to buy 10% extra decking material toaccount for cuts and waste. Tips from ZZ the HANDYMAN for Accurate Estimates Deck Material Calculator Tools You Can Try While ZZ the HANDYMAN can guide you personally, here are some free online tools youcan use:● Decks.com Decking Calculator● Lowes Deck Designer● Home Depot Deck Estimator ● Blocklayer.com Deck Calculator Remember, every calculator has limitations — having ZZ the HANDYMAN double-checkyour estimates can prevent expensive mistakes. When to Call a Pro like ZZ the HANDYMAN While calculators are helpful, they’re not a substitute for professional experience. Considercalling ZZ the HANDYMAN if:● Your deck design includes angles, curves, or multiple levels● You need help with permits or local building codes● You want a complete deck installation from start to finish● You’re unsure about material selection or load-bearing structures ZZ the HANDYMAN combines decades of hands-on experience with modern tools to ensureyour deck is built safely, beautifully, and within budget. Frequently Asked Questions Q1: How much decking material should I order as a buffer?A: A 10% buffer is standard for cuts, errors, and future repairs.Q2: Can I calculate deck materials without using software?A: Yes. You can use a simple formula:(Deck Square Footage ÷ Coverage of One Board) + 10%Q3: What’s more cost-effective: wood or composite?A: Wood is cheaper upfront, but composite is more cost-effective long-term due to lowmaintenance. Conclusion: Build Smarter with ZZ the HANDYMAN Building a deck should be exciting — not overwhelming. With a solid deck material calculatorand the expert guidance of ZZ the HANDYMAN, you’re setting yourself up for success.Whether you’re a DIY warrior or prefer a professional touch, estimating your materials rightis the first step toward your dream outdoor space.Need help with your next deck project? Contact ZZ the HANDYMAN today forpersonalized advice, accurate estimates, and top-notch craftsmanship.

Deck Material Calculator: Your Ultimate Guide with ZZthe HANDYMAN Read More »

Replace Vinyl Flooring

How to Replace Vinyl Flooring the Right Way

Brought to you by ZZ the HANDYMAN – Your Trusted Flooring Expert in the USA Vinyl flooring is a popular choice across the USA for good reason. It’s cost-effective, durable, and comes in styles that mimic wood, stone, or ceramic. But even the best vinyl has a lifespan. When it starts peeling, bubbling, or just looks outdated, it’s time for a change. In this guide, ZZ the HANDYMAN walks you through how to replace vinyl flooring the right way. Whether you’re taking the DIY route or thinking about hiring a professional, this detailed step-by-step blog is here to help you make the right moves. Why Replace Vinyl Flooring? Knowing when to replace your vinyl floor is essential for maintaining your home’s beauty and safety. Here are some of the most common reasons people across the USA replace vinyl flooring: Replacing vinyl flooring gives your home a fresh, clean, and modern feel. It also adds value, especially if you’re planning to sell. Tools & Materials You’ll Need Whether you’re hiring ZZ the HANDYMAN or going the DIY route, these are the essential tools and supplies: Tools: Materials: Step-by-Step Guide to Replacing Vinyl Flooring Step 1: Remove the Old Vinyl Flooring This is the most labor-intensive part of the job. How to Do It: 💡 ZZ the HANDYMAN Tip: Wear gloves and safety goggles. A clean removal makes the installation smoother. Step 2: Prepare the Subfloor A well-prepped subfloor is crucial to the durability of your new vinyl flooring. What to Check: 💡 Pro Tip: If you’re installing over concrete, make sure it’s completely dry. Moisture can destroy vinyl over time. Step 3: Measure the Room Accurately Accurate measurements will save you time, money, and frustration. Here’s How: 💡 ZZ’s Advice: “Measure twice, cut once.” Mistakes in this step can be expensive. Step 4: Cut the New Vinyl Flooring Whether you’re using planks, tiles, or sheet vinyl, cutting accurately is key. For Vinyl Sheets: For Planks or Tiles: 💡 ZZ the HANDYMAN Note: Always leave a small expansion gap (about 1/4 inch) around the perimeter. Step 5: Install the New Flooring Here comes the most rewarding part! For Peel-and-Stick Vinyl: For Glue-Down Vinyl: For Click-Lock Vinyl Planks: 💡 ZZ Reminder: Follow the manufacturer’s instructions closely. Each brand has unique requirements. Step 6: Finishing Touches Clean edges and finishes are what turn a good job into a great one. Vinyl Flooring Replacement: DIY or Call ZZ the HANDYMAN? While DIY sounds fun and budget-friendly, vinyl flooring installation comes with its own challenges. Let’s compare: Feature DIY ZZ the HANDYMAN Skill Required Moderate Professional Tools Needed Yes No – all tools provided Time Taken 1–2 days Half to full day Risk of Mistakes High Very low Quality Guarantee None Yes ZZ says: “If you’re unsure about even one step, give me a call. A poorly installed floor can cost more in the long run.” Caring for Your New Vinyl Floor Now that your new vinyl flooring is installed, keep it in great shape: Do: Don’t: 💡 ZZ the HANDYMAN Aftercare Tip: Set a reminder to re-seal seams (if needed) once a year for longer life. FAQs – Replacing Vinyl Flooring How long does vinyl flooring last? Typically, 10–20 years, depending on traffic and maintenance. Can I install vinyl over old vinyl? Yes, but only if the existing floor is in perfect condition—flat, clean, and not peeling. Is vinyl waterproof? Most modern vinyl flooring is water-resistant or waterproof, especially luxury vinyl tiles and planks. Why Choose ZZ the HANDYMAN? ZZ the HANDYMAN is a trusted name across the USA for high-quality vinyl flooring replacement and other home improvement services. Here’s what sets ZZ apart: So whether you need one room redone or your entire home’s flooring replaced, trust ZZ the HANDYMAN to get the job done right—the first time.  Ready to replace your vinyl flooring? Contact ZZ the HANDYMAN today! Final Thoughts Vinyl flooring replacement doesn’t have to be overwhelming. With a bit of planning, the right tools, and attention to detail — or help from ZZ the HANDYMAN — you can enjoy a beautiful, durable new floor that elevates your living space. So roll up your sleeves or give ZZ a ring. Either way, your dream floor is just a few steps away!

How to Replace Vinyl Flooring the Right Way Read More »

Close Off a Fireplace to Prevent Heat Loss

How to Close Off a Fireplace to Prevent Heat Loss

Introduction An open, unused fireplace may look charming, but it can act like a straw, pulling warm, conditioned air straight out of your living space and replacing it with cold drafts. According to the U.S. Department of Energy, leaving an open damper in winter is equivalent to leaving a window wide open, wasting up to 14 percent of your total home energy budget. For homeowners determined to trim their utility bills without sacrificing cozy aesthetics, properly closing off the fireplace is one of the quickest wins available. In this in‑depth guide, ZZ the Handyman walks you through the main approaches—from temporary, renter‑friendly fixes to permanent, code‑compliant solutions—while highlighting safety caveats, tool lists, and maintenance tips. Whether you’re tackling the job yourself or deciding when to call a pro, you’ll find everything you need below. Why Unused Fireplaces Leak Heat No Firebox Insulation: Fireplaces sit on exterior walls; without backside insulation, they become heat sinks, absorbing the warmth you just paid to create. Four Main Ways to Close Off a Fireplace Method Skill Level Cost Range (USD) Best For Reversible? Chimney Balloon / Draft Stopper Beginner $40–$75 Quick seasonal sealing Yes Rigid Insulation Plug (“Flue Plug”) Beginner–Intermediate $60–$120 Year‑round efficiency Yes Glass Fireplace Doors w/ Weather‑Strip Intermediate $250–$700 Occasional burning + aesthetics Semi Full Permanent Closure (Insulated Panel & Top‑Seal Damper or Flue Cap) Advanced / Professional $500–$1,800 Fireplace permanently out of service No (Prices current mid‑2025; regional labor may vary. Contact ZZ the Handyman for an exact quote in your area.) Step‑by‑Step Instructions Option 1: Chimney Balloon Tools & Materials Steps Maintenance Option 2: Rigid Insulation Plug Tools & Materials Steps Pro Tip from ZZ the Handyman: Mark the front “THIS SIDE OUT” so you reinstall correctly after seasonal cleaning. Option 3: Glass Doors with Weather Stripping Tools & Materials Steps Downside: Glass conducts heat outward in summer; a thermal drape may be needed to block solar gain. Option 4: Permanent Closure with Panel & Top‑Seal Damper A permanent closure involves two components: an interior insulation panel at the firebox and a lock‑tight top‑seal damper or flue cap at the chimney crown. Because code often mandates accessibility for future inspection—and because working on a roof is dangerous—ZZ the Handyman recommends professional installation. Process Overview Safety & Code Considerations DIY vs. Hiring a Pro Closing a fireplace looks simple—until you’re perched on a 10‑pitch roof wrestling with a metal damper in January winds. Homeowner tasks such as chimney balloons or rigid plugs are weekend‑friendly; installing glass doors or top‑seal dampers straddles the line. Factor in ladder safety, masonry drilling, and warranty validity for prefab kits. ZZ the Handyman brings specialized tools, infrared cameras to verify the seal, and the experience to spot hidden flue cracks you might miss. Better yet, skilled pros complete the job in hours, often bundling it with a yearly chimney sweep and inspection—saving you time and money long‑term. Maintenance Checklist Frequently Asked Questions Q: Will a chimney balloon melt if I accidentally light a fire? A: Most balloons include a safety burst disk that deflates quickly when temperatures rise. Still, melted plastic can be messy—always remove before use. Q: Can I close off a fireplace and later install a gas insert? A: Absolutely. The top‑seal damper can be reopened; the interior panel is removable. Inform ZZ the Handyman of the plans so we can use reversible fasteners. Q: How much heat do glass doors save? A: Studies show high‑quality, gasketed doors cut fireplace heat loss by 80 percent compared with an open damper alone. Q: Are balloons safe for gas log sets? A: No. Gas appliances need an always‑open flue. Choose a gasketed damper instead. Conclusion A poorly sealed fireplace is a silent budget buster, siphoning away hard‑earned rupees or dollars each heating season. By installing a simple chimney balloon or investing in a permanent closure, you can see instant savings and a more comfortable, draft‑free living room. Ready to button up your hearth for good? ZZ the Handyman offers free on‑site assessments, infrared leak detection, and same‑day installation services across the region. Call (808) 378‑5570 or visit ZZtheHandyman.com to schedule your consultation and start capturing the warmth you pay for—right where it belongs

How to Close Off a Fireplace to Prevent Heat Loss Read More »

Leaking Window

Who to Call for a Leaking Window: Your Guide to Fast, Reliable Repairs with ZZ the Handyman

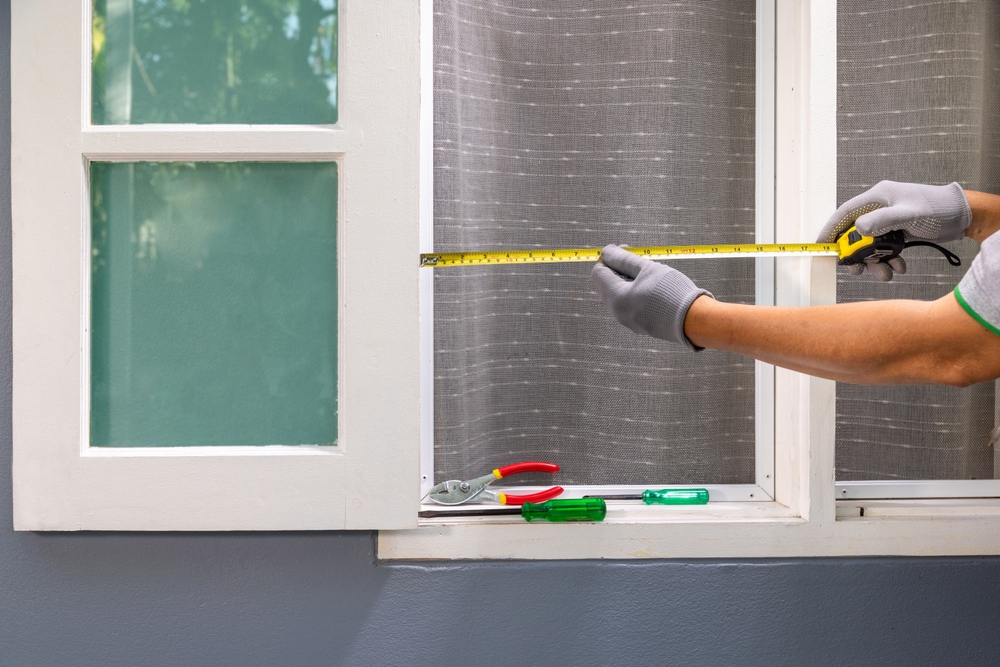
If you’ve recently discovered a leaking window, you’re not alone. It’s one of the most common — and frustrating — issues homeowners face. Whether it’s a slow drip, foggy panes, or water pooling on your windowsill, leaks can lead to serious damage over time, including mold growth, rot, and structural compromise. So, who should you call for a leaking window? This guide walks you through the signs, causes, and solutions of window leaks — and explains why ZZ the Handyman might just be your best call. Understanding the Problem: What Causes a Leaking Window? Before you pick up the phone, it’s important to understand why your window is leaking. There are multiple potential culprits, and pinpointing the cause is the first step toward a proper fix. 1. Poor Installation If your window wasn’t installed correctly, gaps and misalignments can allow water to seep through during heavy rain. 2. Worn-Out Seals and Caulking Over time, the sealant around your window frame can deteriorate, crack, or separate from the wall, leaving room for moisture to sneak in. 3. Clogged or Faulty Window Drainage Windows, especially modern ones, come with built-in drainage systems. When these get blocked with dirt, leaves, or debris, water has nowhere to go — and may come inside instead. 4. Flashing Problems Window flashing is a thin material that directs water away from the window structure. Improper or damaged flashing is a common cause of leaks. 5. Cracks in the Frame or Glass Sometimes the window itself is damaged. A cracked frame or pane can allow water infiltration, especially during storms. Signs You Need to Call a Professional Window leaks can be sneaky. Here are some warning signs you shouldn’t ignore: If any of these sound familiar, it’s time to act. Who to Call for a Leaking Window? Here’s where things get real: not every contractor is right for the job. You might be tempted to call a roofer or general contractor, but the most effective — and affordable — option is often a skilled handyman with experience in window repairs. And that’s where ZZ the Handyman comes in. Why ZZ the Handyman Is the Right Choice Affordable, Honest, and Fast Unlike large window replacement companies, ZZ the Handyman offers affordable, honest service tailored to your needs, not upselling you on a full window replacement when a repair will do.   Local Expertise ZZ serves homeowners across the United States, bringing years of hands-on experience fixing everything from minor leaks to major window damage. He knows how regional weather patterns affect windows and can recommend the best materials and sealants for long-lasting repairs. All-in-One Solutions Whether it’s sealing, caulking, flashing, frame repair, or complete window removal and reset, ZZ the Handyman does it all. That means you don’t need to call multiple contractors — one call gets the job done right. Emergency Response Dealing with a sudden storm leak or flooded window sill? ZZ offers emergency handyman services in many areas. He’ll stop the leak fast and assess the damage so you can prevent further problems. What to Expect When You Call ZZ the Handyman When you contact ZZ for a leaking window, you’re getting more than just a repair — you’re getting peace of mind. Step 1: Thorough Inspection ZZ starts with a comprehensive window inspection, checking the seals, sills, flashing, frame condition, and nearby walls for water damage. Step 2: Diagnosis and Repair Plan Once the issue is diagnosed, ZZ explains the problem in simple, no-nonsense language, and outlines your repair options. Whether it’s a quick sealant job or full-frame replacement, you’ll know exactly what to expect. Step 3: Precision Repairs ZZ uses high-quality tools and materials to ensure a long-lasting solution. From resealing and weatherproofing to re-flashing or window frame fixes, he’s meticulous about getting it right the first time. Step 4: Cleanup and Follow-Up Once the job’s done, ZZ cleans the work area thoroughly and may schedule a follow-up (depending on the severity) to ensure everything’s holding up after the next rain. How to Prevent Window Leaks in the Future While ZZ the Handyman is always ready to help, he also believes in helping homeowners prevent problems before they start. Here are a few of his top tips: 1. Inspect Windows Every Season Look for cracked caulking, foggy panes, or signs of wear every few months. 2. Keep Weep Holes Clear Use a thin wire or toothpick to keep the drainage holes at the base of your windows clean and open. 3. Reseal When Needed Exterior caulk doesn’t last forever. Check it yearly and reapply if it’s cracked, brittle, or peeling. 4. Install Window Awnings In areas with frequent rain, small awnings or overhangs can protect your windows from direct exposure to water. When Is It Time to Replace the Window? ZZ the Handyman is all about repair over replacement — but sometimes, a window is just too far gone. Consider replacing your window if: If that’s the case, ZZ can still help you select and install energy-efficient replacement windows that suit your style and budget. Frequently Asked Questions Can I fix a leaking window myself? If it’s a small issue like a hairline crack in the caulk, DIY repair may work temporarily. However, improper sealing can make things worse. For most leaks, it’s better to call an expert like ZZ the Handyman to avoid long-term damage. How much does a leaking window repair cost? Costs vary based on the severity and location of the leak. A simple resealing job might be under $150, while major repairs can run higher. ZZ the Handyman offers free estimates and transparent pricing, so you’re never in the dark. Will insurance cover a leaking window? Sometimes. If the leak was caused by storm damage or other covered events, your homeowner’s insurance may help with repair costs. ZZ can provide a detailed invoice and damage report to assist with claims. Final Thoughts: Don’t Wait — Fix It Now A leaking window may seem like a small problem, but left

Who to Call for a Leaking Window: Your Guide to Fast, Reliable Repairs with ZZ the Handyman Read More »

Installs Water Heaters

Who Installs Water Heaters? What You Need to Know Before Hiring a Professional

A water heater is one of the most important appliances in any household. Whether you’re taking a hot shower, washing dishes, or doing laundry, a reliable water heater ensures comfort and efficiency. But when it’s time to install a new water heater, the question many homeowners ask is: “Who installs water heaters?” The short answer is that licensed plumbers, HVAC technicians, and skilled handymen, such as ZZ the Handyman, are all capable of installing water heaters, depending on the complexity and type of installation required. In this article, we’ll walk you through everything you need to know before hiring a professional to install your water heater. From understanding the different types of installers to key questions you should ask, and why someone like ZZ the Handyman may be the right choice for your project. Types of Professionals Who Install Water Heaters Before hiring anyone, it’s crucial to know who’s legally and professionally qualified to install a water heater in your home. 1. Licensed Plumbers Plumbers are the traditional choice for installing water heaters. They’re trained in water lines, drainage, and venting—all essential to water heater operation. If your installation involves changes to the plumbing system or if you’re replacing a gas heater, a licensed plumber is often the safest choice. Pros: Cons: 2. HVAC Technicians Heating, ventilation, and air conditioning (HVAC) technicians can install tankless or hybrid water heaters that are more advanced and energy-efficient. If you’re investing in a high-tech system, an HVAC specialist might be best equipped to handle both the electrical and thermal aspects. Pros: Cons: 3. Professional Handyman Services (Like ZZ the Handyman) For straightforward installations—especially replacement of an existing electric or standard gas water heater—a skilled handyman can be a cost-effective and reliable solution. ZZ the Handyman, for instance, brings years of experience, trusted local service, and a solid reputation in residential repairs and installations. Pros: Cons: When Should You Hire a Handyman Like ZZ the Handyman? If your installation is a like-for-like replacement (replacing an electric water heater with another electric one in the same location), ZZ the Handyman is the perfect fit. His handyman service is known for prompt, professional, and trustworthy work in local communities, and he can save you time and money without compromising safety or quality. Ideal Scenarios to Hire ZZ the Handyman: Types of Water Heaters: Who Installs What? Understanding your water heater type can help you choose the right installer: 1. Tank Water Heaters Traditional water heaters that store hot water in a tank are the most common. Installation is straightforward, and handymen like ZZ can usually handle these easily—especially electric units. Best Installed By: Plumbers or experienced handymen   2. Tankless Water Heaters These systems heat water on demand and require more technical installation, often including venting and electric or gas adjustments. Best Installed By: HVAC professionals or licensed plumbers 3. Hybrid Heat Pump Water Heaters These units are energy-efficient and use heat from the air to warm your water. They are more complex and need an HVAC pro for proper setup. Best Installed By: HVAC technicians 4. Solar Water Heaters Using solar panels to heat water, these are rare in typical homes and require specialized installation. Best Installed By: Solar energy contractors or licensed professionals Questions to Ask Before Hiring a Water Heater Installer Whether you hire a plumber, HVAC tech, or handyman like ZZ, make sure you ask these questions: 1. Are You Licensed and Insured? Even for a handyman, insurance and experience are essential. ZZ the Handyman carries liability insurance and provides receipts for every job, ensuring you’re protected. 2. Do You Have Experience With This Type of Water Heater? Ask about past projects. ZZ the Handyman has documented dozens of successful water heater installations, so you know you’re in safe hands. 3. What Will the Total Cost Be? Avoid surprises by getting a full quote, including: 4. What’s Your Warranty or Service Guarantee? Professionals should back up their work. ZZ the Handyman offers a service satisfaction guarantee—if it’s not right, he’ll make it right. Warning Signs of an Unqualified Installer Protect your home and your wallet by avoiding red flags like: Pro Tip: Search for “ZZ the Handyman reviews” in your area—you’ll see why so many homeowners trust his expertise. How Long Does a Water Heater Installation Take? Typically, a standard water heater replacement takes about 2 to 4 hours. Tankless systems may take a full day or longer due to electrical and plumbing upgrades. With ZZ the Handyman, most electric unit replacements are done in under 3 hours, with minimal disruption to your daily life.   What Is the Average Cost of Water Heater Installation? Here’s a general breakdown: Type of Water Heater Installation Cost Range Electric Tank Heater $150 – $500 (labor only) Gas Tank Heater $300 – $800 Tankless Heater $800 – $2,000+ Note: ZZ the Handyman typically offers bundled pricing that includes removal, installation, and cleanup, helping you avoid hidden costs. Why Choose ZZ the Handyman? If you’re tired of waiting for overbooked plumbers or paying top dollar for basic installation, ZZ the Handyman is your go-to solution. Here’s why: ✅ Local Expertise ZZ knows local building codes, hardware stores, and trusted parts suppliers. You’ll get fast, community-based service. ✅ Transparent Pricing No hourly surprises. ZZ provides upfront estimates with no pressure. ✅ End-to-End Service Need a new water heater? ZZ can help you select the right model, pick it up, install it, and dispose of the old one—all in one visit. ✅ Multi-Skilled Beyond water heaters, ZZ handles drywall repair, light plumbing, fixture replacements, and more—saving you time on follow-up tasks. ✅ Reliable and Trustworthy With hundreds of happy customers, ZZ the Handyman is known for dependable service and honest work.   Final Thoughts: Choose the Right Pro for the Job So, who installs water heaters? It depends on your situation: By understanding your needs and asking the right questions, you’ll be equipped to make the best decision for your home and your budget. Whether it’s a simple replacement or a full

Who Installs Water Heaters? What You Need to Know Before Hiring a Professional Read More »

Sump Pump Installation

Sump Pump Installation Cost: What to Expect and How to Budget

If you live in an area where heavy rains, snow melts, or a high water table are common, protecting your home from water damage should be a top priority. One of the most effective ways to do this is by installing a sump pump. While the benefits of having a sump pump are significant, many homeowners are often unsure of the installation cost and how to budget for it properly.In this comprehensive guide, we’ll break down everything you need to know about sump pump installation costs, the types of systems available, and budgeting tips. As always, ZZ the Handyman is here to provide trusted, professional insights and services to help keep your home dry and protected. What Is a Sump Pump? Before diving into the costs, it’s important to understand what a sump pump is and how it works. A sump pump is a device installed in the lowest part of a basement or crawl space. Its job is to prevent flooding by collecting and pumping out water that accumulates in a sump basin, typically caused by rain, groundwater, or plumbing issues. The pump redirects the water away from your home’s foundation to a designated drainage area. Why You Might Need a Sump Pump Installing a sump pump is a smart investment for homeowners who experience: Even if you haven’t had major water issues yet, a sump pump acts as preventive protection, helping you avoid thousands of dollars in future repair costs. Average Sump Pump Installation Cost The national average cost for installing a sump pump ranges between $500 and $2,500, depending on several factors. Here’s a general breakdown: Type of Sump Pump Estimated Cost (Including Installation) Pedestal Pump $500 – $1,200 Submersible Pump $700 – $2,500 Battery Backup System $900 – $2,000 Combination System (Main + Backup) $1,200 – $3,000 These estimates include both the cost of the pump itself and labor charges. At ZZ the Handyman, we work with homeowners to offer affordable, efficient solutions without compromising quality. Factors That Affect Installation Cost Let’s break down the primary elements that can influence your final price tag: 1. Type of Pump 2. Pump Capacity & Quality Higher horsepower and better-quality materials mean a more expensive unit, but often a longer lifespan and better performance. 3. New Installation vs. Replacement 4. Location & Accessibility Installing a sump pump in a finished basement or a hard-to-reach area can increase labor time and cost. 5. Battery Backup System Adding a backup system ensures your pump continues to work during power outages — a must-have for flood-prone zones. 6. Permit and Inspection Fees Depending on your city or county, permits may be required. These fees can range from $50 to $250. Labor Costs Labor can account for 50% or more of your total expense. You’re typically looking at: ZZ the Handyman offers transparent pricing with no hidden fees, ensuring you’re aware of what you’re paying for every step of the way.   Additional Costs to Consider 1. Excavation Work If your basement doesn’t already have a sump pit, we’ll need to excavate one. This process can cost $300 to $800, depending on soil and foundation type. 2. Drainage Line Installation Directing the water safely away from your foundation is crucial. Installing drainage piping may add $200 to $600. 3. Electrical Work If a nearby outlet isn’t available, adding a new GFCI outlet can cost $150 to $500. 4. Battery Backup or Wi-Fi Monitoring Upgrading with smart tech or backup features improves reliability and monitoring but may increase cost. How to Budget for Sump Pump Installation Here’s a quick step-by-step guide to preparing your finances: Step 1: Get a Professional Inspection Call ZZ the Handyman for a free or low-cost assessment to evaluate your needs and give you an accurate estimate. Step 2: Prioritize Quality Don’t go for the cheapest option. A reliable system may cost more upfront but saves money in long-term repairs and replacements. Step 3: Build in a 10-15% Buffer Unexpected complications (rocky soil, additional drainage needs) can increase costs. Always budget a little extra. Step 4: Explore Financing Options Ask your contractor about payment plans or financing options, especially if it’s part of a larger waterproofing project. DIY vs. Hiring a Professional Installing a sump pump is not a beginner-level DIY project. It involves: Unless you’re highly experienced, it’s best to leave it to professionals. ZZ the Handyman has the tools, team, and experience to complete the job safely and efficiently, with warranties and peace of mind. Maintenance Tips to Protect Your Investment Once your sump pump is installed, regular maintenance is key: Need a hand? ZZ the Handyman offers maintenance packages to keep your pump running smoothly year-round. Signs You Need a Sump Pump Now Not sure if it’s time to act? If you notice any of these signs, don’t delay: Call ZZ the Handyman for an immediate evaluation before a small issue becomes a major disaster. Why Choose ZZ the Handyman? At ZZ the Handyman, we know how important your home’s foundation and safety are. When it comes to sump pump installation, we offer:  Expert technicians with years of experience  Fast and affordable service Transparent pricing with no hidden fees Custom solutions for every home Maintenance support and long-term reliability We treat your home like it’s our own — because you deserve dependable protection.

Sump Pump Installation Cost: What to Expect and How to Budget Read More »

Bathroom

Budget-Friendly Bathroom Fixes You Can Get Done This Weekend

 Transform Your Bathroom Without Breaking the Bank—Fast, Simple, and Smart Fixes by ZZ the Handyman Your bathroom is one of the most frequently used rooms in your home, but it doesn’t require a complete renovation to look and feel better. Whether you want to freshen up the design or fix small issues, there are plenty of budget-friendly upgrades you can complete in just a weekend. At ZZ the Handyman, we specialize in quick, effective bathroom upgrades for homeowners across the USA. Small changes can make a big impact, especially when done right. This guide offers practical, low-cost ideas to give your bathroom a fresh new look—fast. 1. Swap Out Old Fixtures Outdated hardware can make your bathroom feel stuck in the past. Replacing faucets, showerheads, towel bars, and cabinet handles with sleek modern versions instantly boosts your bathroom’s appearance. Choose finishes that match your style—brushed nickel, black matte, brass, or stainless steel. ZZ the Handyman Tip: We’ll remove your old fixtures and install the new ones neatly and efficiently, leaving you with a polished, updated look. 2. Re-Caulk the Tub and Sink Old, cracked caulking around the tub and sink not only looks bad—it can lead to mold, mildew, and water damage. Re-caulking these areas gives your bathroom a clean, fresh appearance while helping to prevent leaks and decay. Why Call ZZ the Handyman: Our team ensures straight, smooth caulk lines and uses mildew-resistant formulas that last longer than DIY solutions. 3. Paint the Vanity or Cabinets Is your bathroom vanity looking dated or dull? A fresh coat of paint can give it an entirely new personality. From bold navy to classic white, you can transform your cabinets with just a bit of color. Leave It to ZZ: We’ll handle all the prep, priming, and painting using moisture-resistant paints designed specifically for bathroom use. 4. Upgrade Your Mirror A plain or outdated mirror can make your bathroom feel unfinished. Adding a decorative frame to your current mirror or replacing it with a stylish framed version gives your bathroom an instant facelift. ZZ the Handyman Can Help: We’ll install your new mirror securely and ensure it’s perfectly centered, aligned, and complements your lighting. 5. Install Peel-and-Stick Wall Tiles or Flooring Peel-and-stick tiles are an easy way to add a modern touch without the hassle of grout or major renovations. They’re perfect for backsplashes, accent walls, or bathroom flooring, and they come in many patterns and styles. Professional Touch from ZZ: We’ll ensure the tiles are cut and placed properly for a seamless, high-quality finish. 6. Change the Lighting Fixtures Good lighting makes a huge difference in your bathroom. Replace old, yellow-toned lights with brighter, energy-efficient LED fixtures, or add elegant vanity lights above the mirror. Let ZZ Do It Right: From removing old fixtures to rewiring and installing new ones, we take care of everything safely and cleanly. 7. Add Floating Shelves or Storage Solutions Bathrooms often lack storage, but floating shelves or compact wall units add both function and style. You can display rolled towels, candles, small plants, or everyday toiletries in an organized, attractive way. Installation by ZZ the Handyman: We’ll measure, level, and secure your shelves to ensure they’re both beautiful and sturdy.   8. Replace the Shower Curtain and Accessories Sometimes, it’s the small details that matter. A new shower curtain, fresh bath mat, and matching accessories like soap dispensers and toothbrush holders can dramatically refresh your space with minimal effort. ZZ’s Design Tip: Choose a unified color scheme and don’t forget to upgrade hardware like curtain rods and hooks—we’ll help install those too. 9. Install a Water-Saving Toilet Kit or Faucet Aerators If you’re looking to make your bathroom more eco-friendly, simple tools like faucet aerators or water-saving toilet kits can reduce your water usage without sacrificing performance. Eco Upgrade Made Easy: ZZ the Handyman will identify the best solutions for your bathroom and install them quickly, helping you save water and money. 10. Fix That Leaky Faucet or Running Toilet Leaky faucets or constantly running toilets are more than just annoyances—they waste water and could cause long-term damage. These issues are often quick fixes for professionals but can become costly if left alone. Call in the Pros: ZZ the Handyman will identify the problem and fix it efficiently, ensuring your fixtures are watertight and working as they should. Why Homeowners Across the USA Trust ZZ the Handyman When it comes to quick, affordable home repairs, ZZ the Handyman is a go-to name for homeowners across the USA. We’ve helped families nationwide upgrade their bathrooms over a weekend—without expensive remodels or stressful DIY attempts. Here’s what makes us different: The Bathroom You Want Is Closer Than You Think You don’t need a big renovation to love your bathroom again. Whether it’s a faucet swap, fresh coat of paint, or new light fixture, small fixes add up to a major improvement in how your space looks and feels. At ZZ the Handyman, we make these upgrades quick and stress-free. With weekend services available and a focus on affordability, we’re the perfect partner for homeowners looking to make real improvements—without the mess or the massive price tag.

Budget-Friendly Bathroom Fixes You Can Get Done This Weekend Read More »

property owners

Why Handyman Services Are Essential for Airbnb and Rental Property Owners

As the short-term rental and real estate industries continue to grow, property owners arediscovering that maintaining a high standard of upkeep is not just good business—it’sessential. Whether you’re a seasoned Airbnb Superhost or a landlord managing multiplerental properties, one thing is certain: things break, wear out, and need regular attention.That’s where a reliable handyman comes in.Handyman services, such as those offered by ZZ the Handyman, play a crucial role inkeeping your property in top shape, protecting your investment, and ensuring your guests ortenants have a five-star experience. The Hidden Costs of NeglectNeglecting even small repairs can lead to bigger problems down the road. A dripping faucettoday could become a mold problem tomorrow. A faulty door lock could compromise guestsafety. These issues don’t just cost money—they can destroy your reputation on platformslike Airbnb and VRBO, where reviews are everything.A well-maintained property can command a higher nightly rate and reduce costly turnover.That’s why savvy property owners are turning to handyman services as part of their coremanagement strategy.Why Every Rental Property Owner Needs a Handyman This rapid response ensures your property is always guest-ready, helping you maintain highoccupancy and positive reviews. A qualified handyman like ZZ the Handyman can ensure these small but critical elementsare always addressed. Happy guests leave glowing reviews, which boost your visibility andbookings. What Can a Handyman Do for Your Rental Property?You might be surprised by the range of services a handyman can offer. Here are some ofthe most common tasks requested by Airbnb and rental property owners:● Furniture Assembly & Mounting: Beds, couches, shelving, and TVs● Drywall Repair: Holes, cracks, or moisture damage● Painting: Touch-ups or full-room refreshes● Plumbing Repairs: Clogged drains, faucet replacements, toilet fixes● Electrical Fixes: Light switches, outlet issues, ceiling fans● Door & Window Repair: Broken locks, squeaky hinges, alignment issues● Exterior Maintenance: Deck repairs, fence fixes, power washing● Appliance Installation: Microwaves, garbage disposals, dishwashers With ZZ the Handyman, you get all of these services under one roof—saving you time andlogistical headaches.Airbnb Superhosts Rely on Reliable MaintenanceThe Airbnb Superhost badge is earned by providing exceptional guest experiences, and abig part of that is the property condition. Superhosts are expected to:● Have a guest rating of 4.8 or higher● Maintain low cancellation rates● Respond quickly to guest issues● Have minimal maintenance complaints Keeping up with this standard means ensuring every fixture, surface, and amenity is workingperfectly. ZZ the Handyman becomes an extension of your hosting team, helping youdeliver the excellence that earns 5-star reviews.Long-Term Rental Owners Also BenefitWhile Airbnb hosts need fast service and frequent touch-ups, long-term rental owners alsobenefit greatly from handyman services: ● Move-in/move-out maintenance● Wall patching and repainting between tenants● Regular inspections for wear and tear● Preventive maintenance to avoid major repairs● Upgrades to keep the unit competitive in the market Partnering with ZZ the Handyman allows you to stay ahead of tenant complaints andmaintain positive landlord-tenant relationships.Seasonal Maintenance You Shouldn’t SkipOwning a rental property comes with seasonal responsibilities. Here are a few examples ofmaintenance tasks that a handyman can tackle throughout the year:● Spring:○ Gutter cleaning○ Fence repairs○ Painting and touch-ups○ Power washing patios and decks● Summer:○ AC filter changes○ Exterior caulking○ Garden shed fixes○ Outdoor lighting installation● Fall:○ Window insulation○ Door sealing○ Water heater checkups ○ Fireplace inspections● Winter:○ Pipe insulation○ Emergency weatherproofing○ Snow damage repairs (where applicable)○ Smoke detector and carbon monoxide checks With ZZ the Handyman, these seasonal tasks can be scheduled in advance to keep yourproperty safe, beautiful, and functional year-round.Why Choose ZZ the Handyman?There’s no shortage of handymen out there, but ZZ the Handyman stands out for a few keyreasons:● Trusted Reputation: Known for reliability, professionalism, and attention to detail● Fast Response Time: Especially important for short-notice or emergency work● Versatile Skill Set: Covers everything from carpentry to minor plumbing to tech setup● Affordable Pricing: Transparent, upfront rates that won’t break your budget● Local Expertise: Serving the Atlanta area with in-depth knowledge of local buildingcodes and climate-related maintenance needs Whether you’re managing one Airbnb listing or ten long-term rentals, ZZ the Handyman canbe your trusted partner in property maintenance. Final ThoughtsManaging a rental property is a rewarding business, but it comes with its share ofheadaches—especially when it comes to maintenance and repairs. The good news is, youdon’t have to do it alone.Investing in a trusted, professional handyman service like ZZ the Handyman gives you:● Peace of mind● Better guest experiences● Higher rental income● A long-lasting, beautiful property So, the next time a doorknob gets loose, a cabinet hinge breaks, or you need help gettingthe property ready for the next guest—don’t stress. Call ZZ the Handyman and get the jobdone right, the first time.

Why Handyman Services Are Essential for Airbnb and Rental Property Owners Read More »

Garage Makeover Magic

Garage Makeover Magic: Storage and Repair Tips from ZZ the Handyman

A cluttered garage is more than just an eyesore — it’s wasted space, a safety hazard, and a constant reminder of procrastinated projects. But with a little strategy and some professional tips from ZZ the Handyman, you can transform your garage into a clean, organized, and functional space you’ll actually want to use. Whether you need room for your tools, bikes, seasonal decorations, or even want to create a workshop or home gym, this guide is packed with expert advice on garage storage solutions and essential repairs. Let’s roll up our sleeves and dive in! Why a Garage Makeover Matters Your garage is often the first and last space you see each day. Yet it’s the one place in the home that’s most likely to be neglected. A proper garage makeover does more than improve aesthetics. It: ZZ the Handyman knows that even the smallest upgrades can make a big difference. Whether you’re starting from scratch or refreshing a tired space, here’s how to do it right. Step 1: Clear the Clutter You can’t organize what you don’t understand. Begin your garage makeover by taking everything out. The “Three-Pile” Rule Sort all items into: ZZ Tip: “Most garages are 60% clutter. You’re storing what you don’t need and wasting space on things you’ll never use again. Clear the junk and your possibilities multiply.” Step 2: Plan Your Layout Like a Pro Once you’re left with what’s worth keeping, it’s time to create zones based on how you use your garage. ZZ suggests planning zones for: Sketch it out on paper or use free online tools like SketchUp to visualize the space. Step 3: Smart Storage Solutions That Work One of the most common issues ZZ sees is wasted vertical and overhead space. Most homeowners spread items across the floor, which quickly leads to chaos. Here’s how to fix that: 1. Wall-Mounted Shelving Ideal for bins, car supplies, gardening tools, and more. Install adjustable units to grow with your needs. 2. Pegboards Perfect for hanging hand tools, drills, hammers, and more. Label each spot to keep things in their place. 3. Overhead Racks Install ceiling racks for seasonal items like holiday decorations or camping gear. Make sure the racks don’t interfere with the garage door’s operation. 4. Cabinets & Lockers For chemicals, sharp tools, or valuables, locked storage adds a layer of safety. 5. Bike & Ladder Hooks Use sturdy, wall-mounted hooks to store bikes, ladders, hoses, and extension cords vertically. ZZ Tip: “Use your walls and ceiling first. Every square foot on the floor is prime real estate — protect it!” Step 4: Essential Repairs You Shouldn’t Ignore Garage functionality depends on more than just storage. ZZ the Handyman often finds that garages suffer from wear and tear that homeowners ignore for years. Here are the top repairs you should prioritize: 1. Garage Door Maintenance 2. Lighting Upgrades A dark garage is dangerous. Replace outdated bulbs with bright LED fixtures, especially over workbenches. 3. Floor Repairs Got cracks in your concrete? Repair them before they spread. Consider adding an epoxy coating for a smooth, durable finish that’s easy to clean. 4. Insulation and Ventilation If your garage is sweltering in summer and freezing in winter, add insulation. Good ventilation prevents mold and improves air quality — especially if you’re using it as a workshop or gym. 5. Waterproofing Leaks or damp corners? ZZ recommends sealing foundation cracks and installing a dehumidifier or sump pump if necessary. Step 5: Flooring Upgrades for a Professional Finish Don’t overlook the floor! A clean, well-coated floor instantly elevates your garage’s appearance and function. Options ZZ Recommends: ZZ Tip: “Epoxy doesn’t just look good — it resists oil spills, road salt, and heavy traffic. It’s one of the best investments you can make.”   Step 6: Add Purpose and Personality Once the garage is repaired and organized, make it your own. Consider these customizations: 1. Workshop Corner Install a sturdy bench, overhead lighting, and accessible tool racks. Add a stool, vice grip, and power strip for functionality. 2. Home Gym Setup Rubber flooring, a few dumbbells, and a foldable bench can go a long way. Add a wall mirror and Bluetooth speaker for extra motivation. 3. Hobby Station Love woodworking, gardening, or painting? Carve out a corner with dedicated storage and lighting. 4. Charging Station Mount shelves with power strips to charge drills, e-bikes, lawn equipment, and devices. Common Mistakes to Avoid Even with good intentions, homeowners make mistakes during garage makeovers. ZZ warns against the following: The ZZ the Handyman Difference What makes ZZ’s garage makeovers stand out? It’s the combination of craftsmanship, creativity, and customer care. With years of experience helping Atlanta-area homeowners, ZZ delivers not just repairs — but transformations. Clients say: “My garage went from a dumping ground to a dream workshop — ZZ knew exactly what I needed.” “He fixed a leak we didn’t even know about, added shelves, and we’ve never been more organized!” Final Thoughts: Make the Most of Your Garage Your garage has the potential to be much more than a place to park. With the right mix of organization, repairs, and upgrades, it can become one of the most valuable spaces in your home. So, what are you waiting for? If you’re in the Atlanta area, reach out to ZZ the Handyman for a custom garage makeover plan. Whether you need small repairs or a full transformation, ZZ brings the tools, talent, and vision to make it happen

Garage Makeover Magic: Storage and Repair Tips from ZZ the Handyman Read More »

How to Childproof or Senior-Proof Your Home with Handyman Help

Creating a safe home environment is a top priority for many families in the USA, especially when living with small children or elderly loved ones. Whether you’re preparing for a new baby, helping aging parents, or just want to prevent accidents, childproofing and senior-proofing your home is essential. But if you’re like most people, you may not have the time, tools, or know-how to do it yourself. That’s where ZZ the Handyman can help. With professional handyman services available nationwide, we make your home safer, smarter, and better equipped for the needs of all generations. In this blog, we’ll cover: Why Childproofing and Senior-Proofing Matter Home accidents are a leading cause of injuries for both children and older adults. According to the Centers for Disease Control and Prevention (CDC), more than 2.8 million children visit emergency rooms each year due to home injuries. For seniors, 1 out of 4 adults over 65 experiences a fall each year—many of which occur inside the home. These incidents can have lasting consequences, but they’re often preventable. With the right safety adjustments, you can protect your loved ones from harm and enjoy peace of mind. ZZ the Handyman provides customized solutions that go beyond basic safety products, ensuring a well-rounded and secure living space. Which Parts of the Home Need Childproofing or Senior-Proofing? Every home is different, but the same rooms often contain similar risks. Let’s break it down room by room: 1. Living Room For Children: For Seniors: ZZ the Handyman can expertly install anchors, lighting fixtures, and customized railings to enhance both safety and aesthetics in your living space. 2. Kitchen For Children: For Seniors: From cabinet hardware installation to safety mat placement, ZZ the Handyman helps make your kitchen functional and secure for every age group. 3. Bathroom For Children: For Seniors: Bathrooms can be particularly dangerous, but ZZ the Handyman knows how to make them safer with practical, senior- and kid-friendly upgrades. 4. Stairways and Hallways For Children: For Seniors: ZZ the Handyman can customize stair safety installations for your unique floor plan, reducing risks for both the youngest and oldest members of the household. 5. Bedrooms For Children: For Seniors: Whether you’re childproofing a nursery or modifying a bedroom for an elderly parent, ZZ the Handyman brings the tools and experience needed to make the space safe and comfortable. Safety Upgrades a Handyman Can Help With Many homeowners turn to online tutorials or store-bought gadgets to handle childproofing or senior-proofing—but sometimes, the best results come from professional help. A licensed handyman has the skills, tools, and efficiency to install safety upgrades correctly the first time. Here’s what ZZ the Handyman can assist with: ✅ Anchoring Furniture & TVs Large or heavy items can tip over during play or if used for support. We anchor everything securely to wall studs. ✅ Installing Grab Bars & Handrails A small grab bar can make a huge difference in balance and mobility. Our team ensures bars are installed to ADA standards for maximum stability. ✅ Stair and Flooring Safety From slip-resistant stair treads to threshold ramps, we help reduce trip hazards throughout your home. ✅ Electrical Safety Child-safe outlet covers, tamper-resistant outlets, and organized cords help prevent shocks and burns. ✅ Lighting & Accessibility Improvements We install touch-sensitive lamps, motion lighting, smart switches, and more to support visibility and ease of use for seniors. ✅ Custom Modifications Need a specific type of baby gate or want a more accessible shower? ZZ the Handyman creates custom safety solutions based on your home’s layout. Why Hire ZZ the Handyman? You might be asking, “Why not DIY?” While there are many things you can do on your own, hiring a professional ensures: ZZ the Handyman brings years of experience in home safety improvements across the USA. Whether it’s a one-time fix or a full-home modification, we’re committed to making your home a safer place to live. FAQs About Home Safety and Handyman Services How soon should I childproof my home? Ideally before your child starts crawling—around 6 to 10 months. Get ahead of the curve with professional help to avoid rushing last-minute. Is senior-proofing expensive? It doesn’t have to be. Most safety updates—like grab bars, non-slip flooring, or lighting improvements—are low-cost with a high return in safety. Do I need to be home for the work? It depends on the project. For most minor tasks, you can go about your day while our team handles everything efficiently and respectfully. Is this service available nationwide? Yes! ZZ the Handyman serves customers all across the USA, providing local, reliable, and professional handyman services for families and seniors. Final Thoughts Your home should be a place of comfort—not a source of worry. Whether you’re raising little ones or caring for aging loved ones, a few key changes can prevent life-altering accidents. The best part? You don’t have to tackle it alone. With ZZ the Handyman, families across the USA get dependable, affordable help to make their homes safer for children and seniors alike. From anchoring furniture to installing custom railings and grab bars, we take care of the tough tasks so you can focus on what matters most: your family. Ready to make your home safer? Contact ZZ the Handyman today for a free consultation or safety evaluation. Let us help you childproof or senior-proof your space with confidence and care.

How to Childproof or Senior-Proof Your Home with Handyman Help Read More »